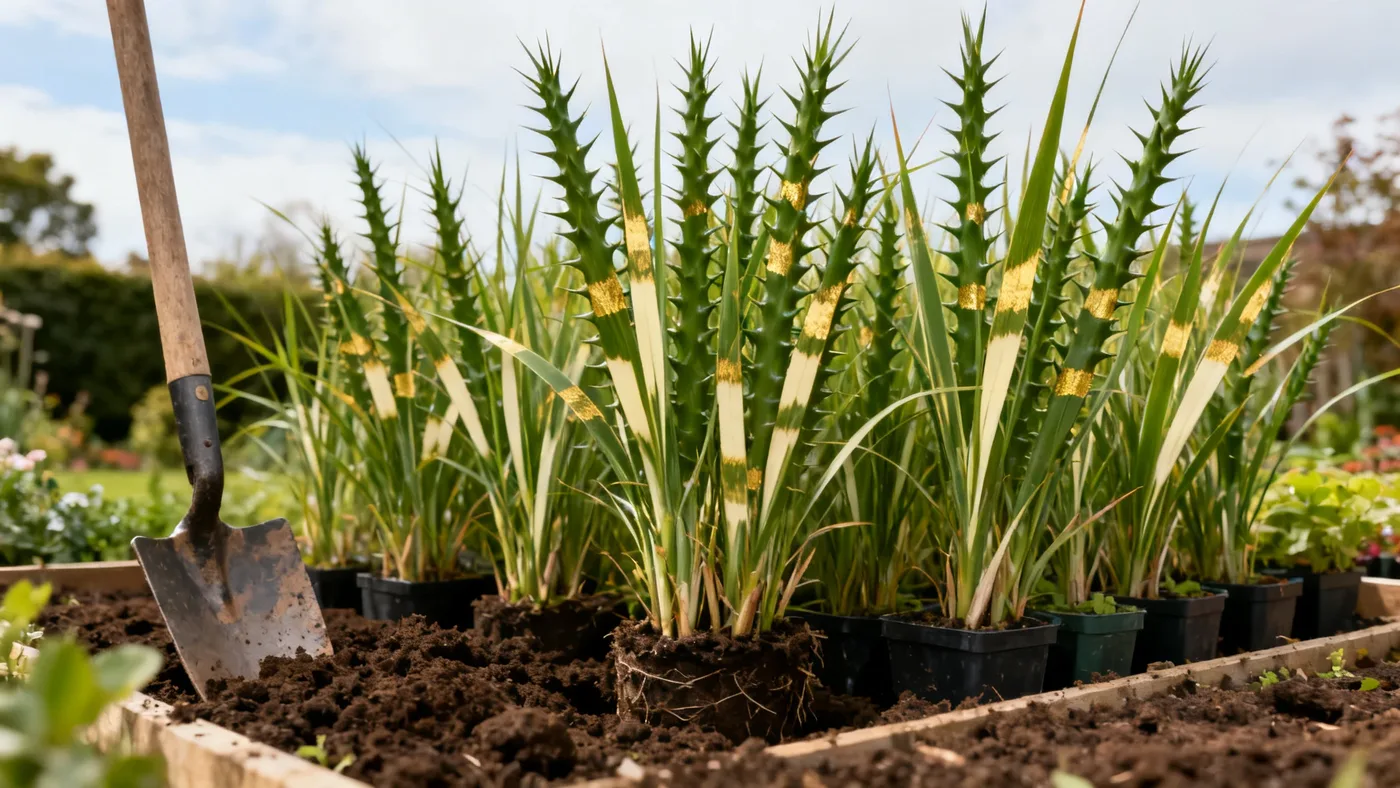
How to Plant Porcupine Grass: Site, Timing and First Weeks
Porcupine Grass (Miscanthus sinensis 'Strictus') rewards straightforward planting with years of upright, banded foliage and reliable fall plumes. The plant adapts to most soils and grows quickly once established, but getting the site and timing right sets the stage for a healthy, vigorous clump. This guide walks you through every step from site preparation through the critical first season.
Before You Plant: What You'll Need
Gather these materials before you dig:
- A quart or #1 container Porcupine Grass plant (the standard nursery sizes)
- Shovel or spade
- Garden fork or cultivator
- Compost or aged bark mulch (2-3 inches deep)
- Balanced fertilizer, such as 10-10-10 (optional for spring planting)
- Watering can or hose
- Measuring tape or ruler (to verify spacing and planting depth)
- Gloves (the leaf blades have sharp edges)
You do not need special soil amendments if your garden soil drains reasonably well. Porcupine Grass is not fussy about pH (adaptable across 5.5-7.5) and tolerates clay, sandy, and loamy soils alike.
Choosing Your Site: Sun, Soil, and Spacing
Sunlight
Porcupine Grass performs best in full sun. The horizontal gold-to-cream bands on the foliage become vivid in bright light, and the plant flowers more abundantly and holds an upright, compact habit in full sun. In part shade or light shade, the banding fades, stems tend to flop, and flowering is less reliable. If your garden has only 4-6 hours of direct sun, the plant will survive but may not display its best appearance. Reserve the sunniest spot in your yard for this grass.
Soil and Drainage
Porcupine Grass adapts to most soils. It prefers moist, well-drained soil but is not overly particular. Clay soils are acceptable. Sandy soils are acceptable. The main concern is standing water: avoid planting in areas that pool during heavy rain or where groundwater sits near the surface year-round. If your site is chronically wet, amend the planting hole with compost to improve drainage, or consider raising the bed slightly.
Once established, Porcupine Grass tolerates short dry spells but performs best without prolonged drought. If your region experiences frequent droughts, plan to water during the hottest months.
Spacing
Space plants 3-4 feet apart. This gives each clump room to reach its mature width of 3-4 feet without crowding neighbors. In a hedge, space on the tighter end (3 feet) for a denser screen. For specimen or accent plantings, 4 feet is comfortable. Do not crowd the plants; poor air circulation can invite rust or leaf spot, and overcrowding forces stems to flop toward light.
Timing Your Planting: When to Plant
The planting window depends on your USDA hardiness zone. Porcupine Grass is hardy in zones 5-9.
Spring Planting (Best Choice for Most Gardeners)
Plant in spring after your region's last frost date. Spring planting gives the grass the entire growing season to establish roots before winter dormancy. Aim to plant as soon as soil is workable, roughly 4-6 weeks after your last spring frost. By late summer and fall, your new plant will have developed a strong root system and will survive winter easily.
Early Fall Planting (Zones 7-9 Only)
If you live in zones 7, 8, or 9, you can plant in early fall, roughly 6-8 weeks before your first fall frost. Early fall planting allows the root system to establish before winter while soil is still warm. Do not plant in late fall or winter in any zone; the plant will not have time to root before freezing temperatures arrive.
If you are in zones 5 or 6, wait for spring. Your winter arrives too early for fall-planted grasses to establish.
Step-by-Step Planting Instructions
Step 1: Prepare the Planting Hole
Dig a hole slightly wider and about as deep as the root ball of your quart or #1 container plant. The top of the root ball should sit at or just slightly above ground level when you settle the plant in place. Digging a hole that is too deep is the most common error; the plant will settle further as soil compacts, and deep planting can lead to crown rot.
Use a shovel or spade to break up the walls of the planting hole so roots can penetrate easily into surrounding soil. Rough, uncompacted walls help roots establish faster.
Step 2: Remove the Plant from Its Container
Water your Porcupine Grass thoroughly the day before or a few hours before planting. Gently slide the plant from its pot. If the root ball is dense and root-bound (common in quart plants), use a garden fork or your fingers to loosen the outer roots gently. Do not be afraid to tease apart the roots a bit. This encourages them to grow outward into the surrounding soil rather than circling within the original root ball.
Step 3: Set the Plant at the Correct Depth
Place the root ball in the planting hole so that the top of the soil in the pot is level with or slightly above ground level. You should not see bare soil at the base of the stems once the hole is backfilled. The crown (where the shoots emerge from the roots) must never be buried deep, or it may rot. Adjust the hole depth as needed until the plant sits correctly.
Step 4: Backfill and Firm the Soil
Backfill the hole with the soil you removed, mixed lightly with compost (about half excavated soil to half compost works well, though pure backfill is acceptable). Do not compact the soil heavily; gentle firming is enough. Overly compact soil limits root penetration and drainage.
Step 5: Water Thoroughly
Water the newly planted grass deeply so that water reaches the base of the root ball and saturates the surrounding soil. This settles the soil and eliminates air pockets. Water should drain into the soil within a few minutes; if water pools on the surface, the site may be too low or poorly draining.
Step 6: Apply Mulch
Spread 2-3 inches of compost or aged bark mulch around the base of the plant, keeping it 3-4 inches away from the stems to allow air circulation at the crown. Mulch conserves moisture, moderates soil temperature, and suppresses weeds. Do not pile mulch against the stems themselves.
The First Weeks: Watering and Monitoring
Watering Schedule
For the first 4-6 weeks after planting, water consistently. Check the soil 2-3 inches deep with your finger. If it feels dry, water. Newly planted grasses need steady moisture to establish roots. Once the plant has been in the ground for 6-8 weeks and you see new growth and active development, you can space out watering. By late summer of the first year, established Porcupine Grass tolerates average rainfall without supplemental watering in most regions.
In spring plantings, the grass will push new shoots rapidly. In early fall plantings, growth is slower as days shorten, but root development continues even if shoots are not visibly expanding.
Fertilizing in Year One
Porcupine Grass is a light feeder. If you planted in spring, apply a single balanced fertilizer (such as 10-10-10) in early summer. Do not over-fertilize; excess nitrogen promotes floppy, soft growth that weakens the plant. If you planted in early fall, skip fertilizer that first year and wait until the following spring to apply a light feeding.
What to Expect in Year One
A spring-planted quart-size Porcupine Grass will likely gain 1-2 feet of height by the end of the first growing season. It may not flower its first year, or flowers may appear late and modest in size. This is normal. The plant is building roots and a sturdy crown. By year 2 and 3, you will see fuller clump development, more reliable flowering, and the mature upright habit the plant is known for.
Common Planting Mistakes to Avoid
Planting too deep. This is the most frequent error. Buried crowns are prone to rot. The top of the root ball should be at ground level, not 2-3 inches below it.
Choosing a shady site. Shade causes weak stems and faded foliage banding. Commit a full-sun spot.
Overwatering established plants. After the first 6-8 weeks, you can ease back on watering. Porcupine Grass does not need daily irrigation. Soggy soil invites disease.
Crowding plants too close. Spacing 3-4 feet apart prevents fungal disease and keeps stems upright. Crowded plants flop.
Fertilizing heavily in year one. Excess nitrogen delays root establishment and promotes soft, floppy growth. A single light spring application is sufficient.
Planting in fall in zones 5-6. Your winter arrives too soon for roots to establish. Spring planting only in cool zones.
Pruning in fall. Never cut back the foliage in autumn. Cutting removes winter interest, exposes the crown to frost and moisture, and invites crown rot. Wait until late winter or early spring.
Looking Ahead: First-Year to Mature
Your newly planted Porcupine Grass will fill out noticeably in its second and third seasons. For detailed care through the seasons, water and nutrition, and pruning techniques, see our complete growing guide. The key is establishing strong roots in year one. Once that foundation is in place, Porcupine Grass is remarkably low-maintenance.
Quick Reference: Planting Checklist
| Task | Details | Timing |
|---|---|---|
| Choose site | Full sun, well-drained soil, 3-4 ft spacing | Before planting |
| Prepare soil | Loosen planting hole, mix compost if needed | Day of planting |
| Plant at correct depth | Root ball top at or slightly above ground level | Day of planting |
| Water deeply | Saturate root ball and surrounding soil | Day of planting and daily for 4-6 weeks |
| Mulch | 2-3 inches, 3-4 inches from stems | Day of planting |
| First-season watering | Check soil 2-3 in. deep; water when dry | Weeks 1-8 post-planting |
| Fertilize (spring planting) | Single balanced application (10-10-10) | Early summer, year one |
| Monitor growth | Expect 1-2 ft gain in year one | Throughout first season |
| Spring pruning (year 2) | Cut back to 4-6 in. above ground | Late winter or early spring, year two onward |