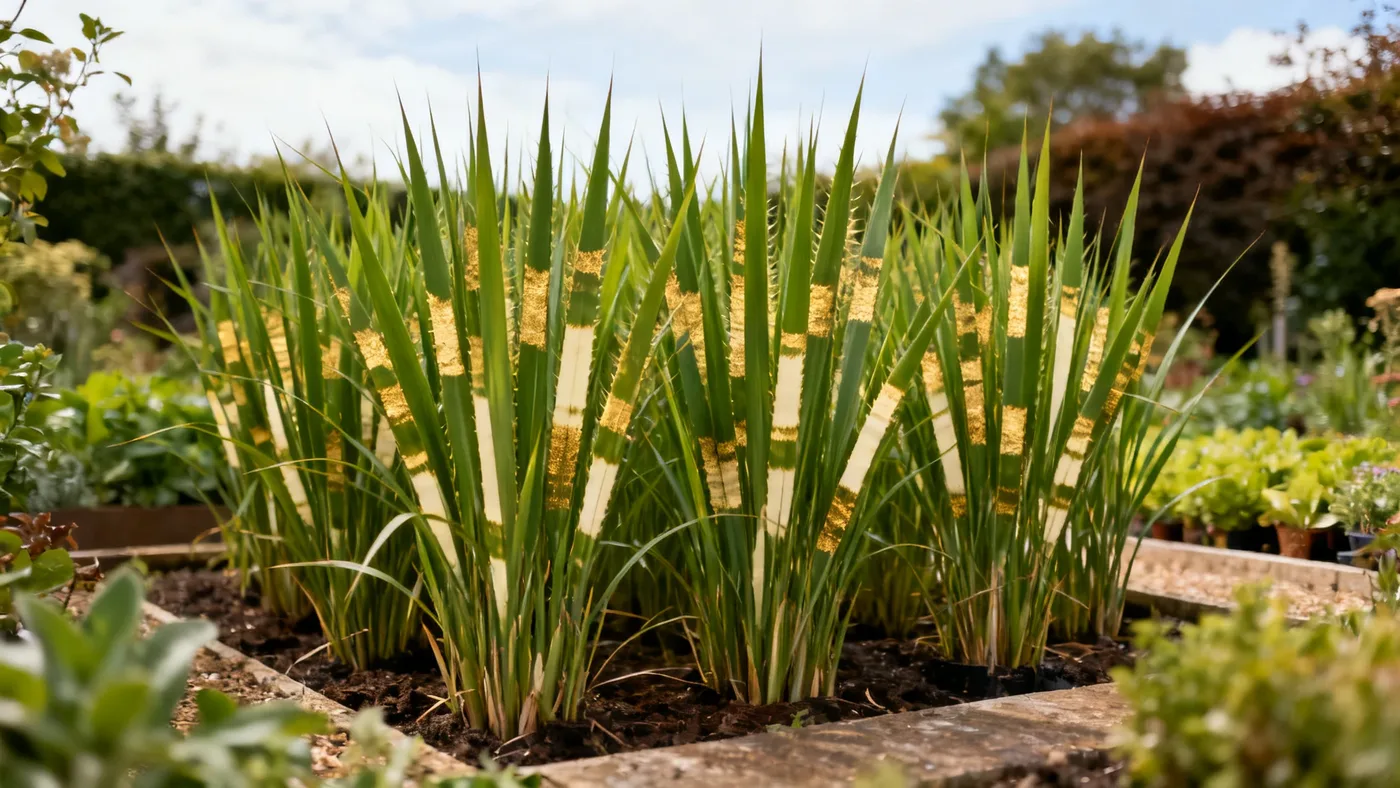
Winter Care for Porcupine Grass: Should You Cut It Back?
When frost arrives and your Porcupine Grass (Miscanthus sinensis 'Strictus') fades to tan and gold, the question hits every gardener: should you cut it down now or leave it standing? The answer shapes how your ornamental grass performs in spring and how it looks through the coldest months. We'll walk you through the timing, the right technique, and what to expect in your zone.
Should You Leave Porcupine Grass Standing Through Winter?
Yes. Leave your Porcupine Grass standing all winter long. The dried foliage and seed plumes will persist through the cold months, adding texture, movement, and visual interest to your landscape. This is one of the defining qualities that makes Porcupine Grass valuable in late-season gardens.
The key rule: do not prune in fall. Cutting back in autumn reduces winter interest and invites crown rot, which can damage or kill the plant's core. Wait until late winter or early spring instead.
Porcupine Grass survives winter across USDA zones 5 through 9, so it will overwinter reliably in most North American climates. Even in zone 5, where winter temperatures drop well below freezing, the crown stays protected beneath soil level while the dried tops remain aboveground for visual appeal.
Materials You'll Need
When spring arrives and it's time to cut back, gather these tools and safety items.
- Heavy-duty pruning shears or lopping shears (hand tools work; hedge trimmers are faster for larger clumps)
- Hedge trimmer or power shears (optional but speeds work on mature clumps 3 to 4 feet wide)
- Work gloves, preferably cut-resistant (the dried blades have sharp edges)
- Long sleeves and long pants
- Bucket or tarp for collecting cut material
- Pruning saw or reciprocating saw (if your clump is very dense)
When to Cut Back: Timing in Late Winter and Early Spring
The window for cutting back is late winter through early spring, right before new shoots emerge from the crown. In zones 5 and 6, this is typically February through early March. In zones 7 and 8, late February through March works well. In zone 9, where the growing season stretches longer, late February is still safe.
If you're unsure of your exact timing, look for the first sign of green growth near the base of the clump. As soon as you spot new shoots beginning to emerge, prioritize cutting back that day or the next. Once new growth is underway, you risk cutting into the tender young leaves.
Earlier is better than later. If you wait until the new shoots are 4 to 6 inches tall, you'll damage them with your pruners.
Step-by-Step Cutting Guide
Here is the process for cutting back your Porcupine Grass safely and effectively.
- Dress in protective gear. Put on cut-resistant gloves, long sleeves, and long pants. The dried foliage is sharp and will cut unprotected skin. This step is not optional.
- Bundle the stems together. If your clump is not too large (3 to 4 feet wide), wrap twine or a soft rope loosely around the foliage, roughly 12 to 18 inches above ground. This holds the stems upright and makes cutting easier. For very large clumps, work in sections.
- Cut to the proper height. Cut all foliage back to 4 to 6 inches above ground level. Leave the short stubble in place; do not dig out the crown. A neat, horizontal cut is ideal. If you're using a hedge trimmer, make one pass at about 4 to 6 inches. Hand shears require more patience but give precise control.
- Clear the cut stems. Collect all the cut material in a bucket or on a tarp. Do not leave it piled in the garden. If your clump is very large and produces a lot of cut material, you may need multiple trips to a compost bin or yard waste collection site.
- Inspect the crown. Once the foliage is removed, look at the base of the clump. The crown should be firm and dry. If you see soft, mushy tissue or an odor, that indicates rot, which may need attention (see Common Mistakes, below).
- Optional: divide the clump. If your Porcupine Grass is more than 3 to 5 years old, the center of the clump may be dying out, leaving a hollow ring of green at the edges. Early spring (right after cutting back) is the time to divide the clump. Dig up the entire plant, split it with a sharp spade into 2 to 4 new sections, and replant each section at the same depth it was originally growing. This rejuvenates the plant and keeps it vigorous.
Tips for Success
Use sharp tools. Dull pruners will crush the stems and leave ragged edges prone to disease. Sharpen your shears before the job or use a hedge trimmer with fresh blades.
Dispose of cut material promptly. Leaving large piles of dried Porcupine Grass in the garden attracts rodents and insects. Bag it, compost it, or haul it to a yard waste facility the same day if possible.
Wear eye protection. If you use a power hedge trimmer, dry foliage can bounce up. Safety glasses are a good idea.
Work on a dry day. Cutting wet, frost-covered foliage is slippery and dangerous. Wait for a clear morning after frost has melted.
Don't cut too short. Leaving 4 to 6 inches of stubble protects the crown. Cutting below 3 inches risks damaging emerging shoots or exposing the crown to frost.
Common Mistakes to Avoid
Mistake: Cutting back in fall. This removes the plant's winter display and invites crown rot. The crown is most vulnerable in autumn and early winter when moisture is high and foliage removal exposes it to freezing. Always wait until late winter or early spring.
Mistake: Leaving the cut foliage piled on the crown. Decomposing plant material holds moisture and promotes rot. Rake or blow the area clear after cutting so air can reach the base of the plant.
Mistake: Cutting into new spring growth. Once new green shoots appear, stop cutting. If you cut the tender shoots, you'll delay growth and reduce the plant's vigor that season.
Mistake: Overwintering a clump that is rotting. If you spot soft, mushy tissue at the crown in late winter, the plant may not survive. Poor drainage or overly wet soil during fall and early winter causes crown rot. If rot is severe, you may need to remove and replace the plant. Ensure future Porcupine Grass is planted in well-drained soil or in a raised bed.
What to Expect After Cutting Back
Within 2 to 4 weeks of cutting back in early spring, new shoots will emerge from the crown. These shoots grow upward quickly. By late spring, your clump will be 12 to 18 inches tall. By midsummer, growth accelerates, and the plant gains roughly 1 to 2 feet of height per season until it reaches its full mature size of 5 to 7 feet tall (including flower plumes) in its second or third season.
The new foliage will be bright green with the characteristic horizontal gold-to-cream bands that define Porcupine Grass. By late summer and fall, small coppery-pink to reddish flower plumes will emerge. These plumes mature to silvery-white or tan by autumn, providing color and texture through fall and into winter.
Overwintering in Cold Zones
In USDA zone 5, where winter temperatures drop to minus 20 degrees Fahrenheit and below, your Porcupine Grass will still survive if you leave it standing through winter. The crown sits below soil level and is insulated by soil itself. The dried foliage aboveground protects the crown from direct wind and helps trap snow, which provides additional insulation.
Do not mulch over the crown in fall or winter. Mulch holds moisture and promotes rot. Let the soil dry naturally as temperatures drop. In spring, as temperatures warm and new growth begins, mulch (if desired) can be applied around the base, 2 to 3 inches deep and set back 2 to 3 inches from the crown.
For detailed care throughout the growing season, see our complete growing guide for Porcupine Grass.
Quick Reference: Winter Care Checklist
| Task | Timing | Details |
|---|---|---|
| Leave standing through fall and winter | September through February | Do not cut back. Enjoy the tan foliage and seed plumes. |
| Monitor the crown | October through February | Watch for soft tissue or odor. Ensure soil drains well after heavy rain. |
| Prepare tools | February or early March | Sharpen shears, gather gloves and buckets before cutting begins. |
| Cut back to 4-6 inches | Late winter / early spring (Feb-Mar, zone dependent) | Cut before new shoots emerge. Work on a dry day. |
| Clear cut material | Same day as cutting | Remove all debris from the base to prevent rot and pest habitat. |
| Optional: divide | Early spring, right after cutting | If clump is 3-5+ years old or has a hollow center, divide into sections. |
| Watch for new growth | 4-6 weeks after cutting | Green shoots emerge from the crown. Growth continues through spring and summer. |