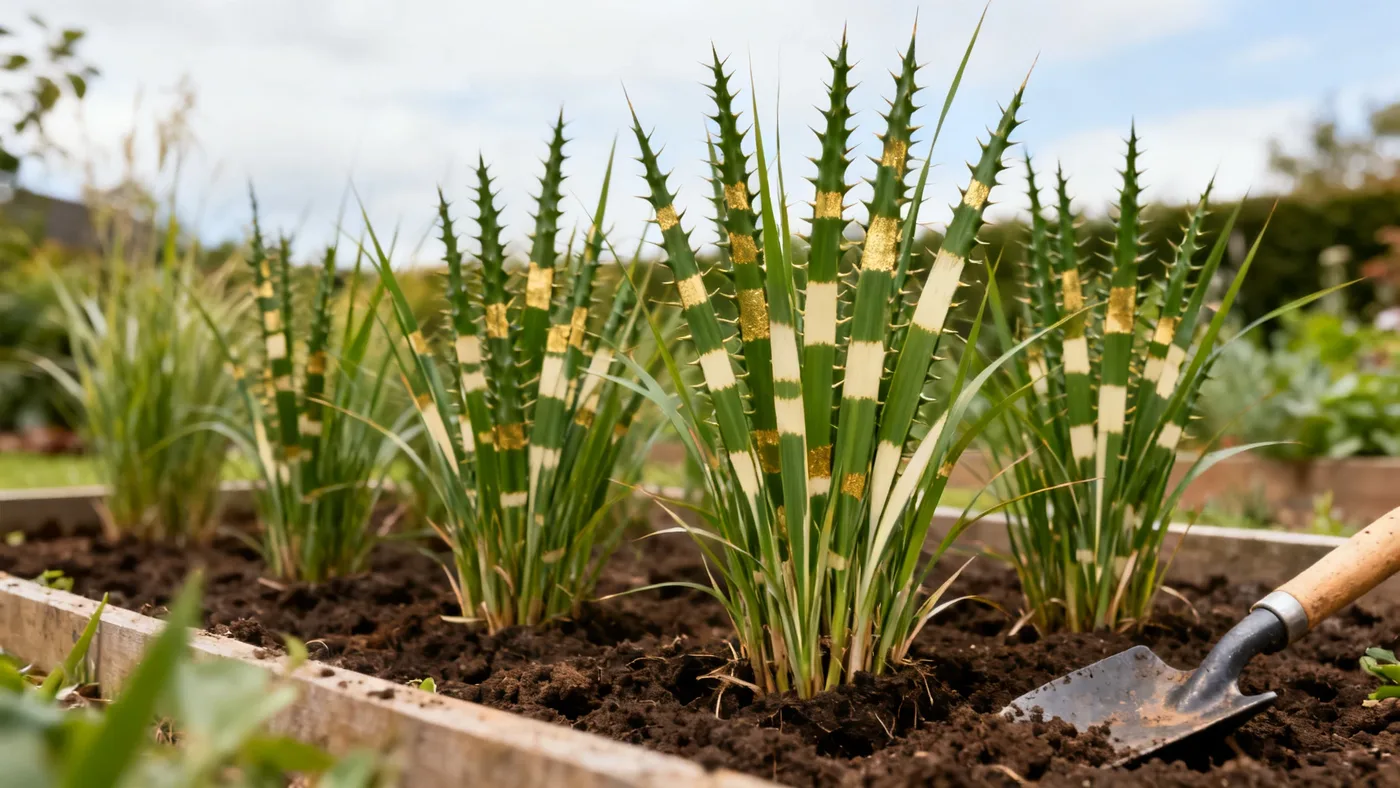
Watering Porcupine Grass: From New Planting to Mature Clump
Porcupine Grass (Miscanthus sinensis 'Strictus') is a resilient ornamental that rewards consistent watering early on with vigorous growth. Unlike true desert grasses, Porcupine Grass thrives on average, consistent moisture, especially during the establishment phase. This guide walks you through watering strategies for each growth stage so your grass develops a deep root system and reaches its full 5 to 7 feet of height and character.
What You'll Need
- Soaker hose or drip irrigation line (optional but highly recommended)
- Standard garden hose or watering can
- Soil moisture meter or your finger to test soil depth
- Mulch (2 to 3 inches of wood chips or compost, kept 3 inches away from the stem)
- Notebook or phone to track watering dates in your first season
Stage 1: New Planting (First 8 to 12 Weeks)
The window immediately after planting is critical. A young Porcupine Grass, typically sold in a quart container from the nursery, has a shallow root ball that dries out quickly in the first few weeks.
Step 1: Water at planting time
Water the root ball thoroughly before you set the plant in the ground. Dig a hole slightly wider and just as deep as the container. Set the plant level with the surrounding soil (not deeper) and backfill with unamended soil. Water the entire planting area with 1 to 2 inches of water the day you plant. This settles the soil and eliminates air pockets.
Step 2: Establish a consistent watering schedule
For the first 4 to 6 weeks, water every 2 to 3 days if rainfall is light. Check the soil 2 to 3 inches down with your finger. If it feels dry at that depth, water. If it holds moisture, skip a day. In hot spells or sandy soil, you may water daily; in clay or cool weather, every 3 to 4 days may be sufficient. The goal is moist (not soggy) soil around the root zone.
Step 3: Apply mulch
Once the plant is in the ground and watered, spread 2 to 3 inches of mulch in a circle around it, leaving a 3-inch gap around the stem to prevent rot. Mulch holds moisture and moderates soil temperature, reducing how often you need to water.
Step 4: Taper watering as growth emerges
By week 6 to 8, new shoots will emerge and the root system begins reaching deeper into the soil. You can gradually reduce frequency to every 4 to 5 days, unless you're in an exceptionally hot or dry region. Keep the soil consistently moist but not waterlogged.
Stage 2: Establishment (Second Growing Season)
By year two, your Porcupine Grass will gain roughly 1 to 2 feet of height and develop a more robust clump. The deeper root system now offers some buffer against drought. This is when you transition from frequent, careful watering to moderate, seasonal schedules.
Step 5: Monitor spring growth
In spring after pruning back the previous year's foliage to 4 to 6 inches, new shoots emerge rapidly. Water twice weekly during this active growth phase (late March through May in most zones). The plant is investing energy in height and biomass, so consistent moisture pays off with faster development.
Step 6: Reduce frequency mid-summer
Once the plant reaches 3 to 4 feet tall (typically by July), established Porcupine Grass tolerates short dry spells. Water deeply once or twice weekly rather than shallow daily drinks. Deep watering encourages roots to reach further down, making the plant more resilient. Aim for 1 to 1.5 inches per week from rain plus irrigation combined.
Step 7: Adjust for late-season flowering
From August through October, Porcupine Grass blooms with coppery-pink plumes that mature to silvery-white. During bloom, maintain moisture at the level from Step 6. Flowering takes energy, and soil that dries out too much may shorten the display.
Step 8: Reduce fall and winter watering
After frost or in late fall, rainfall typically handles most watering needs. Stop supplemental watering unless your area enters a true drought. Let the plant enter dormancy naturally. The dried tan foliage and seed plumes persist through winter and do not require moisture.
Stage 3: Mature Plant (Year 3 and Beyond)
A fully mature Porcupine Grass clump spreading 3 to 4 feet wide is extremely capable. It reaches its full height (5 to 7 feet including flower plumes) by the end of the second or third season and continues to thrive with minimal intervention.
Step 9: Water during drought only
Once established, Porcupine Grass performs best without prolonged drought but can tolerate short dry spells. In a typical growing season with regular rainfall, mature clumps need supplemental watering only during heat waves or droughts lasting more than 2 to 3 weeks. Water deeply once weekly if the soil is truly dry 4 to 6 inches down.
Step 10: Adapt to your zone and soil type
Porcupine Grass thrives in zones 5 to 9. In cooler zones (5 and 6), shorter growing seasons mean less water demand overall. In warmer zones (8 and 9), longer summers may require more frequent summer watering. Soil also matters: clay soils hold moisture longer, so you can water less frequently; sandy or loamy soils drain faster and may need more frequent applications. Adjust based on what you observe, not a fixed schedule.
Tips and Common Mistakes to Avoid
Mistake 1: Overwatering a mature plant
Porcupine Grass is not a wetland grass and dislikes soggy, waterlogged soil. Mature plants in clay soil with excellent drainage may need no supplemental watering in years with normal rainfall. If foliage yellows or stems rot at the base, the soil is too wet. Reduce watering and ensure water drains away within 24 hours of heavy rain.
Mistake 2: Shallow, frequent watering
A light sprinkle every day encourages shallow roots and makes the plant more vulnerable to drought later. Instead, water less often but more deeply. Soak the soil 4 to 6 inches down. This trains roots to go deeper, building resilience.
Mistake 3: Watering the foliage
Always water at the base of the plant. Wet foliage invites fungal disease, especially in humid climates or crowded plantings. Use a soaker hose, drip line, or watering can held low to the ground.
Mistake 4: Forgetting mulch
Mulch is your watering ally. A 2 to 3-inch layer around the plant (not touching the stem) keeps soil cool, reduces evaporation, and cuts watering frequency by 25 to 50 percent. Refresh mulch annually in spring.
Tip 1: Use rain gauges or moisture meters
A simple rain gauge tells you how much natural rain fell. Combine that with mulch and your observation of soil moisture, and you can skip guessing. A soil moisture meter removes the guesswork entirely.
Tip 2: Water early morning
Watering at dawn or early morning (before 9 a.m.) minimizes evaporation and gives foliage time to dry if water splashes on it, reducing disease risk.
Tip 3: Space plants properly for air circulation
Plant clumps 3 to 4 feet apart if you're creating a hedge or massed planting. Good spacing reduces humidity around the base, lowering the risk of fungal issues and allowing more efficient watering to each plant.
What to Expect
With consistent watering in the first season and moderate watering thereafter, you can expect your Porcupine Grass to gain roughly 1 to 2 feet of height per year until maturity. By the end of the second or third growing season, the clump should reach its full mature form with robust, stiffly upright foliage marked by horizontal gold-to-cream bands.
Well-watered plants typically flower reliably from late summer into fall (August through October, depending on your zone), producing coppery-pink plumes that age to silvery-white and persist through the winter. Fall foliage fades to tan and gold, adding seasonal color and interest.
A mature, well-established clump in full sun and average soil is remarkably self-sufficient. For a more detailed overview of care, including pruning, fertilizing, and pest management, see the complete Porcupine Grass growing guide.
Quick Reference: Watering Schedule by Season and Stage
| Stage | Timeline | Frequency | Depth / Amount | Notes |
|---|---|---|---|---|
| New Planting | Weeks 1-6 | Every 2-3 days | Moisten soil 2-3 inches deep | Check soil before each watering. Add mulch at planting. |
| New Planting | Weeks 6-12 | Every 4-5 days | Moisten soil 4-6 inches deep | Taper as root system expands. |
| Establishment (Spring) | Late March-May (Yr 2) | 2x per week | 1-1.5 inches total (rain + irrigation) | Active growth phase. Deep watering preferred. |
| Establishment (Summer) | June-July (Yr 2) | 1-2x per week | 1-1.5 inches total | Reduce frequency as root system matures. |
| Establishment (Bloom & Fall) | August-October (Yr 2) | 1x per week | 1-1.5 inches total | Maintain moisture during bloom. Taper in late fall. |
| Mature (Spring) | March-May (Yr 3+) | Rain-fed; supplemental in drought | 1 inch per week if dry | Deep watering only if soil is dry 4-6 inches down. |
| Mature (Summer) | June-September (Yr 3+) | Rain-fed; supplemental in drought | 1 inch per week if dry | Tolerates short dry spells. No water during heavy rain. |
| Mature (Fall & Winter) | October-February (Yr 3+) | Rain-fed only | Rainfall typical | Stop supplemental watering. Foliage persists without water. |
Watering Checklist for Success
- ✓ Water at planting: 1-2 inches the day you plant.
- ✓ First 4-6 weeks: Check soil 2-3 inches deep; water if dry, skip if moist.
- ✓ Weeks 6-12: Shift to deeper, less frequent watering to encourage roots.
- ✓ Year 2 spring: Water 2x weekly during active growth (late March-May).
- ✓ Year 2 summer-fall: Water 1-2x weekly; reduce frequency after August blooms.
- ✓ Year 3+: Water only during drought or heat wave lasting 2-3+ weeks.
- ✓ Apply 2-3 inches of mulch; keep 3 inches clear around the stem.
- ✓ Water at the base of the plant, early in the morning.
- ✓ In zones 5-6, watering needs are lower; zones 8-9 may need more summer water.
- ✓ Never waterlog; ensure drainage is good and soil dries slightly between soakings.