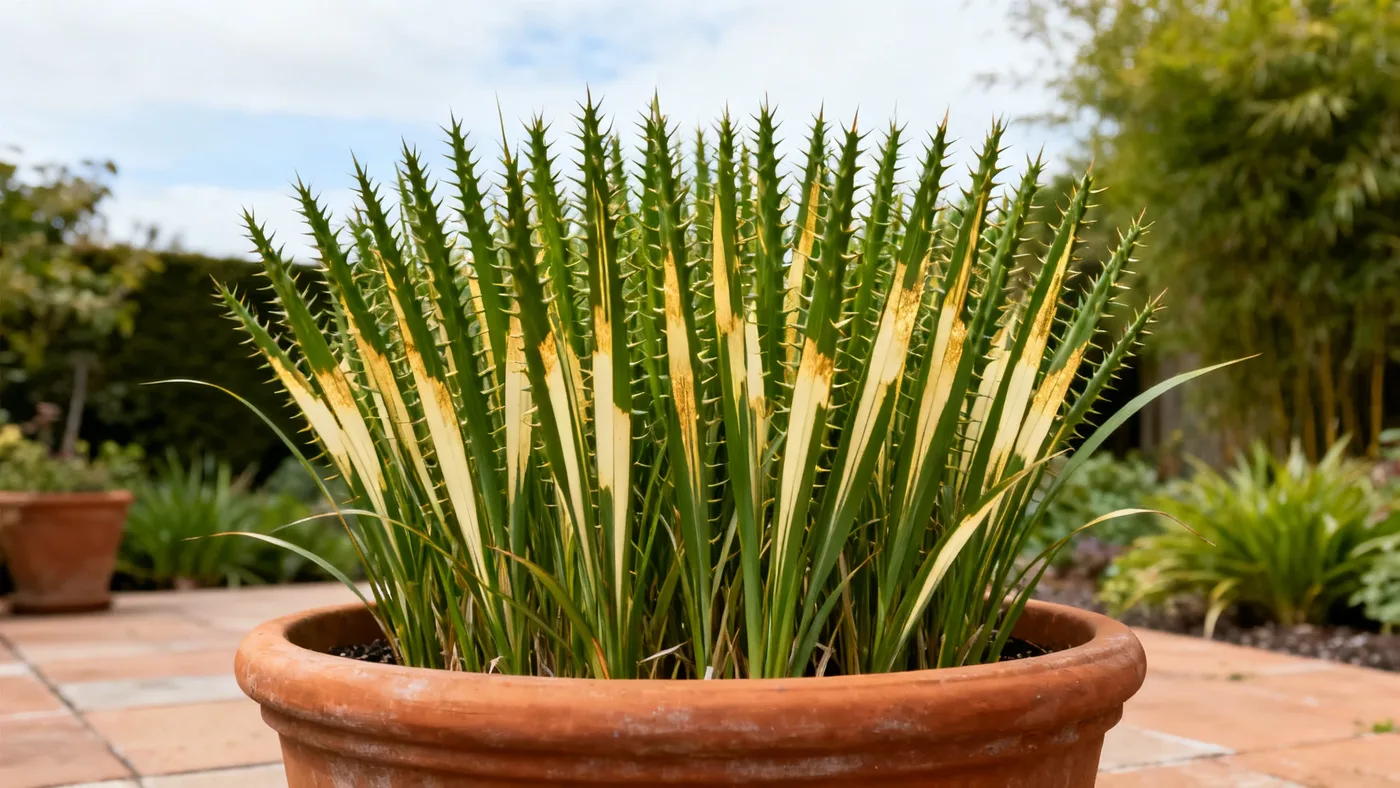
Growing Porcupine Grass in Pots and Containers
Porcupine Grass makes an excellent specimen for container gardening. Its stiff, upright form and striking horizontal gold-banded foliage work beautifully in patio planters, creating year-round visual interest without the space demands of in-ground planting. Whether you want a focal point for your deck, a border accent, or seasonal color on a balcony, growing Miscanthus sinensis 'Strictus' in a pot is practical and rewarding.
Why Container Growing Works for Porcupine Grass
Porcupine Grass is specifically suitable for containers, especially when started young. Nursery-grown plants are commonly sold in quart containers, making them the ideal starting point for container culture. The grass grows at a moderate to fast pace, gaining roughly 1 to 2 feet of height per year until reaching its full size in 2 to 3 growing seasons. This predictable growth arc means you can watch your planting establish and mature without the commitment of large-scale landscape changes.
Container growing also lets you control sunlight exposure more easily. Porcupine Grass needs full sun for best color, flowering, and that rigid, upright habit it's known for. If your patio gets afternoon shade, you can simply move the pot. The horizontal gold-to-cream bands on the foliage appear most vivid in bright light, so container mobility is a real advantage.
Choosing the Right Pot and Size
Start small and plan to upsize. A young quart-sized plant can live in a 3 to 5 gallon container for its first season. However, Porcupine Grass will eventually reach a mature width of 3 to 4 feet and heights of 5 to 7 feet, including the flower plumes. Once the clump begins to mature in its second and third seasons, the roots demand more space.
Upgrade to a container that is at least 15 to 20 gallons for the mature plant. Larger is better: a 20 to 25 gallon pot gives the root system room to expand and reduces the frequency of watering during hot months. Terracotta, plastic, and fiberglass all work, though terracotta dries faster and may require more frequent watering during peak growing season.
Ensure your pot has drainage holes. Waterlogged soil invites root rot and fungal disease. A saucer or tray underneath catches excess water but should not hold standing moisture for more than an hour after watering.
Materials and Soil Preparation
You will need the following before planting:
- One young Porcupine Grass plant (quart-sized from a nursery, or a division from an established clump)
- A pot at least 3 to 5 gallons for the first season, 15 to 20 gallons for the mature plant
- Potting mix formulated for drainage (a general-purpose indoor-outdoor potting soil works, or amend with perlite or coarse sand)
- Compost or aged bark for soil amendment (optional but helpful)
- Balanced fertilizer, such as a 10-10-10 formulation
- Watering can or hose
Porcupine Grass adapts to most soil types and is not fussy about pH (it thrives between 5.5 and 7.5). However, containers drain faster than garden soil, so use a quality potting mix rather than garden soil alone. Garden soil compacts in pots and restricts root growth. A peat or coconut-coir based potting mix, combined with perlite or compost, provides the moist-but-well-drained conditions the grass prefers without waterlogging.
Step-by-Step Planting Instructions
- Select your planting location first. Identify a spot that receives full sun for at least 6 hours daily. This ensures the best foliage banding and robust flowering in late summer through fall.
- Fill the pot one-third full with moistened potting mix. Water the mix lightly so it settles and holds some moisture but is not soggy. This helps the roots establish contact with the soil.
- Remove the Porcupine Grass from its nursery pot. Gently loosen the root ball with your fingers, especially if roots are circling tightly. This encourages outward growth into the new container.
- Set the plant in the pot at the same depth it was growing in its original container. The crown (the point where shoots meet the roots) should sit just at soil level. Planting too deep invites rot; planting too high exposes roots.
- Fill around the sides with potting mix. Firm the soil gently as you backfill, leaving about an inch of space between the soil surface and the pot rim for watering.
- Water thoroughly until water drains from the bottom. This settles the soil and eliminates air pockets. Drain any standing water from the saucer.
- Place the pot in full sun. Allow 2 to 3 days before the first feeding so the roots can recover from transplanting.
Watering and Moisture Management
Consistent moisture is the single most important factor for container-grown Porcupine Grass. Unlike established garden plants, pot-bound roots cannot access deep soil moisture during dry spells. Water when the top inch of soil feels dry to the touch. During the growing season (spring through early fall), this may mean watering every 2 to 3 days in hot weather, or daily if your container is small or in intense sun.
The goal is average, consistent moisture, not wet or dry extremes. Established plants tolerate short dry spells, but container plants have nowhere to retreat to for water. In midsummer heat, morning watering is preferable to evening, as it allows foliage to dry and reduces fungal disease risk. Water at soil level, not overhead, to minimize wet leaves and disease.
Reduce watering in fall as growth slows, and minimize it in winter when the plant is dormant. However, never let the soil dry out completely, even in dormancy. Check soil moisture monthly during cold months and water lightly if the pot has been sitting in dry conditions for several weeks.
Fertilizing Container Plants
Porcupine Grass is a light feeder. A single balanced fertilizer application in spring, such as a 10-10-10 formulation, is sufficient for the entire growing season. Apply it after new shoots have emerged, typically in late winter or early spring as temperatures warm above freezing.
Do not over-fertilize. Excess nitrogen causes soft, floppy growth and can make the typically rigid stems sprawl outward, defeating the purpose of growing this upright cultivar. One light feeding per year is the rule. Established container plants rarely need more.
Pruning and Seasonal Care
Cut all foliage back to 4 to 6 inches above the soil level in late winter or early spring, before new shoots emerge. The exact timing depends on your zone. In zones 5 to 6, this means late February through March. In warmer zones 7 to 9, you may prune in January or early February. Do not prune in fall; the dried foliage provides winter interest and protects the crown from frost and excess moisture.
Use sharp pruning shears or a hedging tool. Wear gloves, as the leaf blades are stiff and can be mildly irritating to bare skin. Remove all dead foliage, place it in your compost pile (if you compost perennial debris), and dispose of any diseased material in the trash.
After pruning, water lightly and apply a balanced fertilizer once new green shoots are clearly visible. The plant will regenerate fully within 4 to 6 weeks.
Winter Care and Overwintering
Porcupine Grass is hardy in zones 5 to 9. Container plants in zone 5 and the colder parts of zone 6 need extra protection because the roots are closer to freezing temperatures than they would be in the ground. The insulating effect of soil depth is absent in pots.
In zones 7 to 9, container plants often survive winter outdoors without additional shelter. Move the pot to a spot protected from strong wind and excessive moisture, such as against a building wall or under an eave.
For zones 5 to 6, consider these options: Move the pot to an unheated garage, shed, or cold frame for the winter. Alternatively, wrap the pot with burlap or bubble wrap to insulate the root zone. Leave the dried foliage in place until late winter to add extra insulation. Water sparingly every 4 to 6 weeks if the soil dries out completely.
Even potted plants can be left outdoors in zones 7 to 9 if the pot is large (25 gallons or more) and positioned in a sheltered location. Smaller pots are more susceptible to freeze-thaw cycles that damage roots.
Common Container Growing Problems and Solutions
Flopping or sprawling stems. This usually results from too much fertilizer, insufficient sunlight, or damage from heavy rain. Reduce fertilizer to one light spring application, ensure at least 6 hours of direct sun daily, and consider staking or a support ring if the plant is in a windy location.
Yellowing or browning leaf tips. Low humidity, inconsistent watering, or salt accumulation in the pot causes tip burn. Maintain consistent soil moisture (not waterlogged), increase air circulation around the pot, and flush the soil annually by slowly pouring fresh water through it to leach out mineral salts.
Poor flowering or sparse foliage. Insufficient sunlight is the most common cause. Porcupine Grass needs full sun to produce robust flower plumes and vivid foliage color. If your pot is in part shade, move it to a sunnier location.
Clump dies out in the center. After 3 to 5 years, the center of the clump may weaken or decline. This is normal. Divide the clump in early spring: remove the entire plant from the pot, cut it into 2 to 4 sections with a sharp spade, and replant one or more divisions in fresh potting mix. Discard the dead center section. A rejuvenated, divided clump will restore vigor for another several years.
Expected Results and Timeline
A young quart-sized Porcupine Grass plant will grow visibly through its first summer, gaining 12 to 18 inches in height. By the end of the first season, you may see the early flower plumes forming in late summer. Flower color ranges from coppery-pink to reddish when new, maturing to silvery-white or tan by fall and winter.
By the second growing season, the clump will have spread to 2 to 3 feet and may reach 4 to 5 feet in height with plumes. Full flowering and mature size typically arrive in the third season, when the plant reaches 5 to 7 feet (including flower plumes) and a 3 to 4 foot spread.
Container plants occasionally grow slightly smaller than in-ground specimens, particularly in zones 5 and 6 where the season is shorter. However, the visual character and hardiness remain the same.
Quick Reference Checklist for Container-Grown Porcupine Grass
| Task | Timing | Notes |
|---|---|---|
| Initial planting | Spring after last frost (or early fall in zones 7+) | Start with quart-sized plant; use 3-5 gallon pot for first season |
| Pot size upgrade | Year 2 when roots establish | Upgrade to 15-20 gallon pot minimum for mature plant |
| Watering | Growing season (spring-fall): every 2-3 days or when top inch of soil is dry | Consistent moisture required; daily in hot weather; reduce in fall/winter |
| Fertilizing | Once in spring after new shoots emerge (late Feb-Mar in zones 5-6; Jan-Feb in zones 7-9) | Use balanced fertilizer (10-10-10); do not over-fertilize |
| Pruning | Late winter/early spring before new growth | Cut back to 4-6 inches above soil level; never prune in fall |
| Winter protection (zones 5-6 only) | After final pruning through late winter | Wrap pot or move to unheated shelter; leave dried foliage in place |
| Division/rejuvenation | Every 3-5 years in early spring as new growth begins | Split clump to restore vigor if center weakens |
For more detailed care throughout the growing season, see our complete Porcupine Grass growing guide.